Archive for the ‘Tech’ Category

We didn’t start the fire: Add MOSFET’s to your 3D printer

I’ve gotten bitten by the 3D printer bug recently, and picked up an Anet A8  around Christmas.

It’s your typical corner-cutting Chinese kit printer, but it’s one of the nicer ones as far as features and electronics components.  Unfortunately, like many cheap 3D  printers, the wire and electronics for delivering power to the bed and hot end is inadequate.  Let’s take a step back for a moment, and understand the basic electronics.

The key components are the power supply, the steppers, the LCD, control board, heated bed, and hot end.  Most of these use very little power.  Even the steppers all working at once use less than a few amps.  The bed and hot end though are power hungry.  I found the bed on my Anet A8 draws ~11 amps, and the hot end ~3 amps (@12v) .  This a lot of current to push through the otherwise low power mainboard, especially for the bed.  This will ultimately lead to failure, and you’ll be hunting for  a whole new mainboard, or worse, putting out a fire.

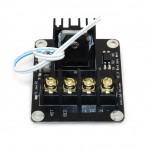
The solution: get that high current off the mainboard!  Adding larger and separate mosfets to handle power deliver to the bed and nozzle takes all that strain off the mainboard, and will extend it’s life dramatically (and reduce the chance of overheating which could lead to fire).  You could probably get away with just adding a mosfet for the bed, but I would suggest adding one for the hot end too.  You’re re-wiring anyway, and they’re cheap, so may as well get as much current off the mainboard as possible.  I used two of these mosfets.

The second problem is the wiring itself.  The wire supplied in most kits suffers two key problems:

1) It’s bare copper, which over time loosens under the screw terminals, leading to resistance, which in turns causes the terminal to overheat and burn.

2) It’s often undersized (I’ve seen kits with 18ga wire that’s carrying close to 20 amps).

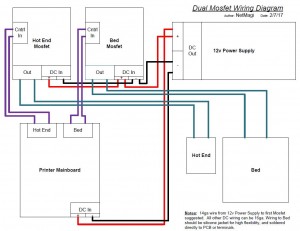
The wiring is an easy fix.   When adding the mosfets (wiring diagram further down), use 14ga wire for the run to the bed mosfet, and a minimum of 16ga for all other DC power runs.   Here is the link to the good silicone 16ga wire I used, and here is the link to the good 14ga wire.  MAKE SURE YOU TIN ALL THE ENDS, OR USE QUALITY CRIMPED ENDS.  I’m personally a fan of tinning all the ends. I’ve never had an issue with a properly tinned wire under a screw terminal.  Come back and snug up the screws in a few days of use.  They will stay tight, have VERY low resistance, and the solder ensures an even connection across all the wire strands.  If you don’t have a good soldering iron, this is a good time to get one.  I use the Hakko FX888D, and it’s exceptional.  You’ll never buy another iron.  If the Hakko is out of your price range, this one would be my choice for a basic iron.

Here’s the wiring diagram that brings it all together (click to view larger):

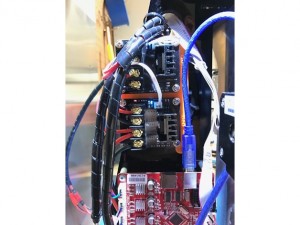
If you happen to also have Anet A8, I designed a mount to hold both of these mosfets, just above your mainboard:

Thanks for reading!

Shell Script To Control Belkin WeMo’s

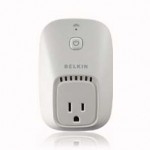
It’s no surprise I’m a huge fan of home automation and tech toys, and I recently picked up a pair of Belkin WeMo’s.

You **have** to set them up with the app they supply for smartphones, but after that I hoped I could find a way to control them directly. Belkin has collected quite a few negative reviews for these devices, and it’s a shame, because the hardware seems real solid.  It’s their current apps that leave a LOT to be desired.  Clearly the issues they’re having getting the app side right are driving down the reviews.  Fortunately, I could care less how the app experience is, since I only needed it to initially deploy the devices, and planned from the get-go to write my own code to control them.

Numerous folks have written tools to control some of the functions of these, but everything I came across was dependent on other libraries, was incomplete, or didn’t work when I tested it.  I like plain-old vanilla shell scripts that I can just run from any local machine, and I’ve hacked up various XML snippets I’ve found and just rely on curl for the following script that I put together:

#!/bin/sh
#
# WeMo Control Script
#
# Usage: ./wemo_control IP_ADDRESS ON/OFF/GETSTATE/GETSIGNALSTRENGTH/GETFRIENDLYNAME
#
#

IP=$1
COMMAND=$2

PORTTEST=$(curl -s $IP:49152 | grep “404″)

if [ "$PORTTEST" = "" ]
then
PORT=49153
else
PORT=49152
fi

if [ "$1" = "" ]
then
echo “Usage: ./wemo_control IP_ADDRESS ON/OFF/GETSTATE/GETSIGNALSTRENGTH/GETFRIENDLYNAME”
else

if [ "$2" = "GETSTATE" ]

then

curl -0 -A ” -X POST -H ‘Accept: ‘ -H ‘Content-type: text/xml; charset=”utf-8″‘ -H “SOAPACTION: \”urn:Belkin:service:basicevent:1#GetBinaryState\”" –data ‘<?xml version=”1.0″ encoding=”utf-8″?><s:Envelope xmlns:s=”http://schemas.xmlsoap.org/soap/envelope/” s:encodingStyle=”http://schemas.xmlsoap.org/soap/encoding/”><s:Body><u:GetBinaryState xmlns:u=”urn:Belkin:service:basicevent:1″><BinaryState>1</BinaryState></u:GetBinaryState></s:Body></s:Envelope>’ -s http://$IP:$PORT/upnp/control/basicevent1 |
grep “<BinaryState”  | cut -d”>” -f2 | cut -d “<” -f1 | sed ’s/0/OFF/g’ | sed ’s/1/ON/g’

elif [ "$2" = "ON" ]

then

curl -0 -A ” -X POST -H ‘Accept: ‘ -H ‘Content-type: text/xml; charset=”utf-8″‘ -H “SOAPACTION: \”urn:Belkin:service:basicevent:1#SetBinaryState\”" –data ‘<?xml version=”1.0″ encoding=”utf-8″?><s:Envelope xmlns:s=”http://schemas.xmlsoap.org/soap/envelope/” s:encodingStyle=”http://schemas.xmlsoap.org/soap/encoding/”><s:Body><u:SetBinaryState xmlns:u=”urn:Belkin:service:basicevent:1″><BinaryState>1</BinaryState></u:SetBinaryState></s:Body></s:Envelope>’ -s http://$IP:$PORT/upnp/control/basicevent1 |
grep “<BinaryState”  | cut -d”>” -f2 | cut -d “<” -f1

elif [ "$2" = "OFF" ]

then

curl -0 -A ” -X POST -H ‘Accept: ‘ -H ‘Content-type: text/xml; charset=”utf-8″‘ -H “SOAPACTION: \”urn:Belkin:service:basicevent:1#SetBinaryState\”" –data ‘<?xml version=”1.0″ encoding=”utf-8″?><s:Envelope xmlns:s=”http://schemas.xmlsoap.org/soap/envelope/” s:encodingStyle=”http://schemas.xmlsoap.org/soap/encoding/”><s:Body><u:SetBinaryState xmlns:u=”urn:Belkin:service:basicevent:1″><BinaryState>0</BinaryState></u:SetBinaryState></s:Body></s:Envelope>’ -s http://$IP:$PORT/upnp/control/basicevent1 |
grep “<BinaryState”  | cut -d”>” -f2 | cut -d “<” -f1

elif [ "$2" = "GETSIGNALSTRENGTH" ]

then

curl -0 -A ” -X POST -H ‘Accept: ‘ -H ‘Content-type: text/xml; charset=”utf-8″‘ -H “SOAPACTION: \”urn:Belkin:service:basicevent:1#GetSignalStrength\”" –data ‘<?xml version=”1.0″ encoding=”utf-8″?><s:Envelope xmlns:s=”http://schemas.xmlsoap.org/soap/envelope/” s:encodingStyle=”http://schemas.xmlsoap.org/soap/encoding/”><s:Body><u:GetSignalStrength xmlns:u=”urn:Belkin:service:basicevent:1″><GetSignalStrength>0</GetSignalStrength></u:GetSignalStrength></s:Body></s:Envelope>’ -s http://$IP:$PORT/upnp/control/basicevent1 |
grep “<SignalStrength”  | cut -d”>” -f2 | cut -d “<” -f1

elif [ "$2" = "GETFRIENDLYNAME" ]

then

curl -0 -A ” -X POST -H ‘Accept: ‘ -H ‘Content-type: text/xml; charset=”utf-8″‘ -H “SOAPACTION: \”urn:Belkin:service:basicevent:1#ChangeFriendlyName\”" –data ‘<?xml version=”1.0″ encoding=”utf-8″?><s:Envelope xmlns:s=”http://schemas.xmlsoap.org/soap/envelope/” s:encodingStyle=”http://schemas.xmlsoap.org/soap/encoding/”><s:Body><u:ChangeFriendlyName xmlns:u=”urn:Belkin:service:basicevent:1″><FriendlyName>Pool Filter</FriendlyName></u:ChangeFriendlyName></s:Body></s:Envelope>’ -s http://$IP:$PORT/upnp/control/basicevent1 |
grep “<FriendlyName”  | cut -d”>” -f2 | cut -d “<” -f1

else

echo “COMMAND NOT RECOGNIZED”
echo “”
echo “Usage: ./wemo_control IP_ADDRESS ON/OFF/GETSTATE/GETSIGNALSTRENGTH/GETFRIENDLYNAME”
echo “”

fi

fi

Copy/Paste or download here: wemo_control.sh

Usage is:   ./wemo_control IP_ADDRESS ON/OFF/GETSTATE/GETSIGNALSTRENGTH/GETFRIENDLYNAME and the functions are pretty self-explanatory.

The usual disclaimer applies.  I don’t write code for a living and there’s probably gross inefficiencies and poor syntax, but it WORKS.

Enjoy :P

AcuRite Acu-Link Internet Bridge (09150TRX): Accessing Local Data

AcuRite has been threatening the release of this product for well over a year, and it’s finally out.  Being a bit obsessive about data in and around my home, (check-out my IP Thermostat install and custom interface) I *HAD* to have one of these.

The “idea” is that you buy the Internet Bridge from AcuRite, and either with your existing sensors from their other products (many are compatible), or with the purchase of additional sensors, live data is transmitted to their “MyBackyardWeather” web site and you can view the data while you’re away and track trends etc.  They even offer a “forecasting” widget.

To get started, I ordered the internet bridge, a tower sensor, and a floating pool sensor.   The bridge is 80 bucks, and the sensors are very reasonably priced at ~ $8 for the tower sensor and $20 for the floating sensor.  They’re shipping is a bit slow, but everything arrived well packed and the build quality of all the devices is quite good.  The tower sensor supplies both temperature and humidity data, and honestly 8 bucks for one of these is a great price.   You’d be hard-pressed to buy just the sensors for an arduino or pi build for that money.

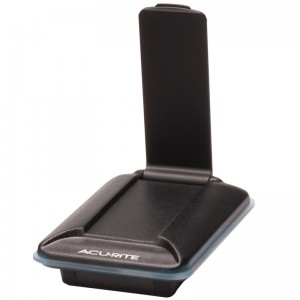
The bridge has a flip-up antenna and two connections, one RJ-45 for a network cable, and one jack for the power plug.  Since the protocol and any real info about how the bridge “talks” to their web site is unpublished and unknown, I figured I’d give it the full packet capture and analysis treatment.   To do this, I added a static DHCP IP mapping for the MAC address of the Internet Bridge to my router/firewall so as soon as it came online, I’d know the IP address.  The MAC address of the Internet Bridge can be found right on the bottom of the unit.  This MAC address is also the “ID” that AcuRite uses to associate your data sources with your account on MyBackyardWeather, but I’ll get to that later.  After setting up the static IP mapping, I enabled packet capture for any TCP/UDP connections from that IP out to the net.  Time to plug it in!

Once connected, the Internet Bridge did two things:

1) started sending sensor data to the Acu-Link web app

2) started downloading new firmware line-by-line with a POST for each new line as one completed

I pulled the connection before the firmware update could complete (just in case), and started to take a closer look at the data sent to the Acu-Link web app via the packet capture.  To my surprise, it looked like the sensor data was being sent  cleartext in a simple HTTP POST, one POST for each sensor in range of your Internet Bridge.  Next, I tried reconnecting the bridge, but this time with WAN access blocked, and ran a full port scan.  Only port 80 was open, and a visit to the Bridge’s local IP in a browser yielded a simple status page informing me that a firmware update was in process.   In the hope that more useful data would be presented when not in the “firmware-update” state, I permitted WAN access and let the firmware update complete.

Once the firmware update completed, the simple status page showed the sensors in range, their signal, and the option to send a POST to the bridge to toggle the LED’s on and off, but no actual sensor data was shown, and there’s nothing to click on, save for the LED toggle.  I tried forcing an error that might yield useful information with various POST’s and GET’s to the simple web interface on the Internet Bridge, but never got more than a 404 or the same status page.

Since querying the data directly from the Internet Bridge seemed unlikely without new information, I returned to looking at the data the Internet Bridge POST’s to Acu-Link, which was a little different now after the update.  The actual variables had additional digits and letters, but the values were still cleartext within this group of digits.  Here’s what the HTTP POST looks like when my Internet Bridge sends data for my tower sensor:

id=############&sensor=11423&mt=tower&humidity=A0590&temperature=A018000000&battery=normal&rssi=4

. . . . . let’s break it down and look at each piece:

id=############

I obfuscated the actual value here, but this is the MAC address of your Internet Bridge

sensor=11423

This is the sensor identifier, and appears to be unique for each sensor, though I only have one tower sensor, so I can’t be sure

mt=tower

This is the type of sensor, probably stands for “model type” if I had to guess

humidity=A0590

The 3rd-5th digits are the relevant ones here, with a decimal point required between the 4th and 5th digits, yielding a value of 59.0 for humidity

temperature=A018000000

Again, the 3rd-5th digits are the important ones here, but the 2nd digit serves the role of  denoting a positive or negative reading as well.  If the reading is positive, it’s a “0″, if it’s negative, it’s a “-”.  This value is also in Celsius, so if you want Fahrenheit, you’ll need to convert it.

battery=normal

This one seems fairly obvious, but I didn’t try inserting an older set of batteries to see what it reports when not “normal”

rssi=4

This denotes the received signal level for the specific sensor, and varies from 0-4

All of this data is super-easy to parse in just about any language.  I’m no programmer, but I’m “dangerous” with BASH scripting, so I figured I could probably whip something up, but how do we get the data if you can’t request it?  TCP dumps are nice for post-analysis. but a pain to do anything with real-time.  An HTTP proxy server with some customization would be an option to intercept the data, as well as IDS with some custom rules that took actions like parsing the data and writing out values that could be sucked up from something else, but I had something even “dirtier” in mind.

Let’s dig into what happens for data to get from the Internet Bridge to Acu-Link’s site from power-on to data.

1) The Internet Bridge powers up and gets an IP, gateway and DNS servers via DHCP (your router typically hands out this info)

2) The Internet Bridge resolves “http://www.acu-link.com” using DNS

3) The Internet Bridge starts making regular HTTP POST’s to the Acu-Link web service at: “http://www.acu-link.com/messages”

4) The Acu-Link web service responds back to each POST from the Internet Bridge with a SUCCESS, and the current firmware version.  (presumably if the FW version is higher than installed on the Internet Bridge, this is what initiates the downloading and install of new firmware).

Knowing the above, I figured the easiest way to get sensor data locally would be to “trick” the Internet Bridge into sending it to me instead of Acu-Link.  To do this, I configured my router/firewall (I use pfSense) to “override” www.acu-link.com by having the local DNS service resolve the hostname to a local IP on my network instead of the “real” IP on Acu-Link’s network.   If you can’t override hostnames or zones on your router/firewall with the local DNS service, or your router/firewall doesn’t offer a local DNS services, there’s several freeware DHCP/DNS software pkgs that you could run on a PC on your network to accomplish that same thing.

Now that I have my Internet Bridge sending it’s data to an IP on my network, I needed something to receive it.  I wrote a simple BASH script to replace the functionality of the “messages” web service at Acu-Link:

#!/bin/sh
echo “Content-type: text/html”
echo

echo “SUCCESS”

POSTDATA=$(cat | tr -d ‘ ‘)

FIELD=1
while [ $FIELD -le 15 ]
do

DATA=$(echo $POSTDATA | cut -d”&” -f$FIELD)
VARIABLE=$(echo $DATA | cut -d”=” -f1)
VALUE=$(echo $DATA | cut -d”=” -f2)

if [ $VARIABLE = id ]
then
ID=$VALUE

elif [ $VARIABLE = sensor ]
then
SENSOR=$VALUE
echo “$VARIABLE=$VALUE” > ../weather_data/”$ID”_$SENSOR.txt

elif [ $VARIABLE = temperature ]
then
WHOLE=$(echo $VALUE | cut -c 2-4)
DECIMAL=$(echo $VALUE | cut -c 5)
CELSIUS=$(echo $WHOLE.$DECIMAL)
VALUE=$(echo “$CELSIUS * 1.8 + 32″ | bc -l)
echo “$VARIABLE=$VALUE” >> ../weather_data/”$ID”_$SENSOR.txt

elif [ $VARIABLE = humidity ]
then
WHOLE=$(echo $VALUE | cut -c 3-4)
DECIMAL=$(echo $VALUE | cut -c 5)
VALUE=$(echo $WHOLE.$DECIMAL)
echo “$VARIABLE=$VALUE” >> ../weather_data/”$ID”_$SENSOR.txt

elif [ $VARIABLE = battery ]
then
echo “$VARIABLE=$VALUE” >> ../weather_data/”$ID”_$SENSOR.txt

elif [ $VARIABLE = rssi ]
then
echo “$VARIABLE=$VALUE” >> ../weather_data/”$ID”_$SENSOR.txt

else
sleep 0
fi

(( FIELD++ ))

done

This reads the raw POST data, then steps through “if” handlers I kludged together to look for each data type.  Grabbing additional data from other sensors would be done just be adding additional handlers for each data type (wind speed, rainfall, etc.).  The script then dumps the data out to files named based on the MAC address and sensor ID’s to a writable directory. I can then query this data from other scripts, or POST it elsewhere (like weather underground, etc.).  Personally, I have a whole web app I’ve written for my IP thermostat that I WAS using external data for the display of outdoor temp/humidity.  Now I’m using ACTUAL data from my AcuLink sensors.   The above script returns just a simple SUCCESS to the Internet Bridge, but the bridge doesn’t seem to care, it just keeps on truckin’ sending more data.  A side-effect to this setup is that your bridge won’t update it’s firmware (possibly breaking any reliance you have on the current behavior) unless you remove your custom DNS entries and let it talk to the “real” Acu-Link web service.

Now, you could stop there and call it a day, but the obvious con to this setup is that Acu-Link’s MyBackyardWeather no longer gets your weather data, and the out-of-the-box graphing, weather forecast’s, mobile apps, etc. are pretty cool.   With a SIMPLE addition to my script, I added the original functionality back in by using curl to POST the data to the “real” web service (in addition to stepping through it locally).  Here’s the addiiton:

curl -d “$POSTDATA” http://acu-link.com/messages/ > /dev/null

Notice I used “acu-link.com” instead of “www.acu-link.com”.  This means our override of the www hostname won’t affect our scripts ability to reach the “real” web service.  A quick visit to MyBackyardWeather confirmed it was again getting fresh data.

In summary, AcuRite makes some great weather hardware, and their Internet Bridge and associated sensor’s are no exception.  I wish they would have built this system a bit more “open” and permitted a simple GET request to the bridge for sensor data, but this product is also very new, and they are very encouraging to their users to suggest new features, etc.  There is even mention that they may offer the ability to query this data directly in the future, but in the meantime: hack-on :P

Sennheiser takes a stab at simple, quality.

Check these out!  Sennheiser is showing off their new Momentum headphones at IFA, and wow, they are sweet!

I’m a sucker for simple, industrial, well-crafted design with a touch of style and class and these look like all that and more.  Brushed stainless, real leather, adjustable. .

I do love my Dre beats, but I’m generally tired of  plastic creaky crap “cans” that look like you’re wearing disposable ear protection.

The real proof lies in how they sound, but I’m keeping my finger’s crossed Sennheiser wouldn’t go to this much trouble to have them sound like crap.

Cheap LCD Humidity/Hygrometer and Thermometer Mod’d To Show Fahrenheit

I bought 2 of  these little digital gems from DealExtreme for $5.90/ea to keep an eye on temp and humidity in my house, basement, and root cellar.

Several reviews clearly said it only displays Celsius and is not mod’able to display Fahrenheit, but I do enjoy a challenge.  Especially  a challenge where something is dirt cheap :)

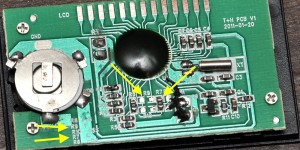
The unit arrives pre-assembled from DealExtreme.  You need only open the battery cover, remove the insulator from the battery and it powers right up.  There are indeed no buttons or controls at all, but there’s (4) tiny screws holding it together.  If you remove these (4) screws, carefully pull the LCD off the board (it’s kind of “stuck” on there), and then remove the little black foam piece, you’ll see this:

[Click the image to see the full-size]

Follow my arrows and you see R7 is labeled “C” and R9 “F”.   The resistor on R7 is marked “0″, meaning zero ohms.  It’s just connecting those two solder dots, that’s it.  I carefully pried that off with a utility knife, and soldered a tiny copper wire between the two dots on R9.

Bam!  Fahrenheit instead of Celsius :)

Note: When you put it back together, be careful to line up the LCD with the PCB so that when you apply pressure the display is complete/correct.  Once lined up, re-assemble with the (4) screws.  The pressure of the case is what keeps the LCD pressing on that PCB to maintain the display.

MapQuest: Free talking turn-by-turn directions for your iPhone

If you’re an iPhone user with friends on Android devices, you’ve probably seen their super-slick google maps with turn-by-turn directions.  Since the google maps app on iPhone will probably *NEVER* get updated to work the same as it does on android for obvious reasons, you have to look elsewhere for turn-by-turn directions.

I’ve gone down this road in the past, and not found anything free worth using in the app store, but that changed recently.

Remember MapQuest?. .  . you know, that site you went to for directions online before google maps existed?  Well, MapQuest has an iPhone app out called “MapQuest 4 Mobile”.  It’s 100% free, gives turn-by-turn directions both on screen and via voice, and recalculates when you miss a turn.

I tried it on my way home a few days ago, and it worked perfectly.  It *does* like to eat the battery, as any GPS app does.  I left work with ~45% battery, and got home with ~30%.   My drive is 35 miles and usually takes just under an hour, so 15% loss isn’t terrible I suppose.

If you have an iPhone, I strongly suggest you give it a try.

Get it here:

http://itunes.apple.com/us/app/mapquest-4-mobile/id316126557?mt=8&ls=1

Build your own 10TB SAN for less than $800

I’ve been upgrading my storage every 2 years or so for at least the last 10 years, and it was time to get serious.

The last two upgrades I made were 2 x 1TB drives in a RAID1, and then up to 2 x 2TB drives in a RAID1.  Both configurations were attached to a mid-level RAID card and offered “ok” performance and “ok” redundancy, since it was a simple RAID1.

Enter, “The problem”:  In addition to growing my storage needs quicker, largely around the fact that my wife and I were downloading a lot of HD TV content, I also started leveraging  VMware a lot more, and disk I/O was becoming a real bottleneck on the pair of 320GB drives I had running in that box (another simple RAID1).  It was only a year since I had moved up to 2 x 2TB HD’s and 3TB HD’s would have barely been a band-aid.

My goal was to solve both problems with 1 solution:

Build a SAN that provided higher I/O capabilities than the current local storage in my VMware box, AND provide bulk storage for the increasing amount of videos we download, pictures we take, music we collect, etc.

I had heard about ZFS years ago, but when I dug deeper, it seemed like it wasn’t ready for prime-time.  Well, things have changed.  ZFS is becoming widely used at the enterprise level and considered stable for production.  ZFS works similarly to how a basic RAID controller functions, but uses a whole x86 computer to act as the controller with ZFS acting like the “firmware” running on the controller.  ZFS offers data integrity verification against data corruption modes, support for high storage capacities, snapshots, copy-on-write clones, continuous integrity checking with automatic repair, and iSCSI through COMSTAR at the OS level.

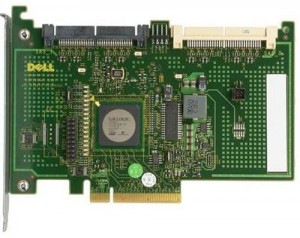
ZFS running on a moderately priced x86 box will far outperform high-end RAID cards that alone cost more than this whole build.  Since ZFS does the “work” you previously counted on the RAID card for, you DON’T NEED high-end RAID cards to attach your drives to in a ZFS box.  You do want “fast” HBA’s, but they’re still cheap. especially if you’re willing to buy used, since these simple HBA’s are what typically ships with base-model servers and are typically “pulled” and sold on eBay.  The HBA in my recipe below is an LSI1068E with a Dell part #.  Several vendors make HBA’s with this chip, so if you can’t readily find the dell part, try looking for cards branded under Lenovo or HP.

Now, the recipe:

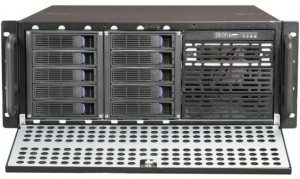
1x NORCO 10-bay Hot Swap Server Chassis = $240

http://www.newegg.com/Product/Product.aspx?Item=N82E16811219037

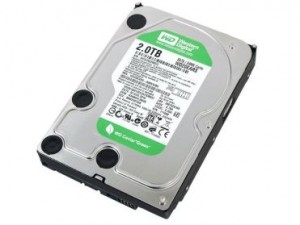
6x Western Digital WD20EARS 2TB SATA HD’s = $540

http://www.newegg.com/Product/Product.aspx?Item=N82E16822136514

2x 1M SAS 32-pin to 4 SATA = $40

http://www.provantage.com/cables-go-10249~7CBT9212.htm

1x LSI 1068E PCIe SATA/SAS Controller = $19 on eBay

http://accessories.dell.com/sna/products/Hard_Drives_Storage/productdetail.aspx?c=ca&l=en&s=biz&cs=calca1&sku=313-8239

Oracle Solaris Express 11 = FREE

http://www.oracle.com/technetwork/server-storage/solaris11/downloads/index.html

TOTAL = $799

This build does expect you have some general experience with storage, x86 PC’s, and a few parts laying around you can re-use.  You’ll notice the above recipe doesn’t include the mobo, cpu, mem, or power supply.  These are all things I had laying around from other builds, and it doesn’t have to be fancy.  Anything dual-core with at least 2GB of mem and a PCIe slot that works with storage adapters will be just fine.  MOST motherboards will work with an HBA in their PCIe slot, but it’s a good idea to do a few google searches before you pull the trigger on a purchase to see if anyone else has tried with that specific board.  I used a Gigabyte mobo and had no issues.  You will want to make sure the power supply you use has enough umphh to power the system and all the drives.  I had a  550w of good quality in my parts pile and used that.

If you don’t have any of the above items, figure another $200-$250 for the build. . which still only puts the total at around $1,000.  If you’re buying a new mobo and cpu, buy something low power.  The difference between a dual core i3 and a quad core i7 will be very little.  Spend your money on memory instead, which will make a far greater impact on performance than raw CPU speed.  The memory in your home-built SAN is used similarly to how the cache would function on a classic RAID card.  The more you have, the faster it goes.

If you plan on building a SAN similar to the one above with ~6 drives, you’ll be fine with a single HBA and the cable linked above.  In addition to the drives you’ll use for your storage, you’ll want a drive or two for the OS.  One drive is all that’s needed, but if you have two laying around, it’s a good idea to have redundancy for Solaris Express, since if the OS goes down, your data will be inaccessible until you reload Solaris on a fresh drive and remount your data pools.

So, build your rig, install Solaris Express (instructions available at the same site linked above for download), and make sure Solaris can “see” all of the hardware in your box.  The next step is configuration.  I opted for configuring via a GUI, but ZFS does have a full-featured command line implementation.  The GUI I used is napp-it, available here (for free):

http://www.napp-it.org/downloads/index_en.html

You can actually install it as easily as running the below one-liner from a root shell on your SAN:

wget -O – www.napp-it.org/nappit | perl

napp-it is basically a simple web app that interfaces with ZFS underneath,  but presents a nice GUI in your browser for building and managing storage pools and their accessability.  There’s LOTS of different ways you can build a storage pool or pools with the 6 drives suggested above, but I would suggest a RAID-Z2.  This works similarly to the classic RAID-6, in that you can lose up to two drives without losing any data.  I won’t go into the other pool types  and/or their merits here, but the ZFS wikipedia page has tons of info:

http://en.wikipedia.org/wiki/ZFS

A 6 disk RAID-Z2 built from 2TB drives will yield about 7.1 terabytes of usable space after formatting.   The same 6 disks in a RAID-Z1 would yield ~9 terabytes formatted, and a simple volume with no redundancy would yield over 10 terabytes.   The reward of up to 30% more usable space is NOT worth the risk of  a single disk failure wiping out all your data.  I would strongly suggest the RAID-Z2 option.

Go build!

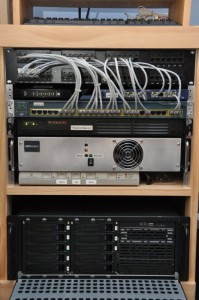
Here’s my home network rack with the completed SAN on the bottom shelf:

click the pic for full-size view

NOTE:  The price for the 2TB drives linked above was $89.99/ea when I put this article together.  With the flooding in Thailand, the prices for all drives skyrocketed, but is starting to settle down again.  If you’re not in a hurry, wait until the price stabilizes.  It  *will* come back down to the $89.99 price point, if it hasn’t already by the time you’re reading this :)

Quick script to add a rule to spamassassin

My spam volume has been ‘up’ lately, probably due to the holidays.

I find myself adding rules to match simple phrases that I seem to get a lot of  to my local.cf, and I figured I’d write a quick dirty script to make the process easier.

Feel free to copy/paste this into a new file in the same directory as your local.cf and don’t forget to chmod 755.  Execute with ./yourfilename (I used rule_creator).  There’s some comments in there to pay attention to, but as long as you place this into the same dir as your local.cf, and use ’service’ for spamd (typical for a qmailtoaster), there’s nothing to do.

Enjoy!

#$/bin/bash
#
# This script must be run from *INSIDE* the directory where your local.cf lives.
#

clear
echo “What should we name this rule? (ex. ‘RICH_DIRECTBUY’)”
echo “”
read RULENAME
echo “”
echo “Should the rule apply to the header or body? (enter: ‘header’ or ‘body’)”
echo “”
read RULETYPE
echo “”
echo “What phrase should the rule match? (ex. ‘get your free credit score’)”
echo “”
read PHRASE
echo “”
echo “How many points should I assign for this rule? (ex. ‘5.0′)”
echo “”
read SCORE
echo “”
echo “”

if [ $RULETYPE = body ]

then
RULELINE=$(echo “body $RULENAME /$PHRASE/i”)

elif [ $RULETYPE = header ]

then
RULELINE=$(echo “header $RULENAME ALL =~ /$PHRASE/i”)

else

echo “Ruletype entered wrong, exiting”
echo “”
exit

fi

SCORELINE=$(echo “score $RULENAME $SCORE”)

clear
echo “”
echo “Ok, I’ll add the following rule to ‘local.cf’:”
echo “”
echo “—————————————————-”
echo $RULELINE
echo $SCORELINE
echo “—————————————————-”
echo “”
echo “”
echo “** Press any key to add the rule, or CTRL+C to exit **”
echo “”
read
echo “” >> local.cf
echo $RULELINE >> local.cf
echo $SCORELINE >> local.cf
echo “”

# This section will restart spamd if you use ’service’ to control it.  If you don’t, you’ll probably just want to comment the whole below section out and restart spamassassin manually

echo “OK – rule added, restarting spamd”
echo “”
cd /service
echo “Stopping spamd”
svc -d spamd
echo “”
echo “Starting spamd”
svc -u spamd
echo “”
echo “Checking spamd status”
sleep 3
echo “”
svstat spamd
echo “”

Review: HP TouchPad – First Thoughts

Persistence paid off, and I was finally able to get an HP TouchPad at the unbelievable price of $99.99.

I got to use it for about an hour last night, so this review is truly first thoughts from a tech geek that swapped his iPad 2 for an HP TouchPad for one night.

The model I’m reviewing here is the 16GB WiFi.

Packaging: I’m only mentioning it, because it was impressive. I’d say it was on par with the quality of the iPad packaging.  An inner box slides out of an outer shell, and the TouchPad is well cushioned and separated from the accessories.  The accessories are under a flap, and also divided from each other.

Accessories: You get a USB cable and a power adapter.  The power adapter is big. . in fact, it’s a bigger then the old-style plastic 35-mm film canisters, and the same shape.  The outlet prongs fold into the cylinder, but it’s still BIG.  If you’re packing light, it’ll be frustrating that the adapter is this big.

The actual quality of both is nice, and it seems like they went out of their way to ensure this.  I bet someone in mgmt said, “OMG, we have to justify the cost of this mediocore product, make everything it comes with look like Bentley made it”.

Device: The TouchPad itself, in my opinion, is of a lower quality than both the iPad 1 and 2.  The chassis is plastic, and the buttons are “ok”.  It’s very similar to the design of the iPhone 3G, which, in my opinion, is also of inferior quality compared to the iPhone 2.5G, iPhone 4, iPad, and iPad 2.   I’ve heard rumors folks are having issues with cracking around the speakers and bottom port, and I believe it.  The design and build quality doesn’t instill the same confidence I have in other portable electronics.  That said, compared to Chinese import cheapo tablets in the $90 – $200 range, this thing is tank.

The screen is gorgeous.  No flaws here whatsoever in my limited play session.  Color rendition is good, brightness is good, viewing angle is good.  Job well done here.  The speakers are also pretty good.  I fired up Pandora and had no complaints.  I think the “beats” name is a bit of a stretch here, and I wonder how much better it could have sounded if they spent the money on the speakers instead of the licensing.  Regardless, it’s better than expected for the size of the device, and loud enough for quiet to moderately noisy environments if it’s right in front of you.

OS/Interface: Wow, such mixed feelings here. . .   I love the way multitasking is handled, and I love that it handles flash, but it feels sluggish and scrolling often pauses or stutters.  Speaking of flash, it did leave me thinking, “wtf Apple, just gimme Flash already”.  99% of the flash I  surfed to worked just fine and didn’t bog the device any more than other pages.  C’mon Apple, make it happen :)

Settings, App mgmt, and customization are all poorly implemented.  To be fair, some of the settings are easily adjusted, but most are buried intuitively leaving you feeling like you’re running Windows 3.11 all over again.  Seriously HP, is this the best you could do?

Media: This was a big fail for me.  Admittedly I spent very little time with it, but I copied an H.264 movie to it that I’ve successfully watched on my iPhone, iPad, Samsung Smart TV, Windows Media Center, VLC, etc., and the TouchPad choked.  I’m sure if I re-encoded it, it’d be fine, but that’s a real pain in the ass if you just want to get some movies on there for the kids before running out the door.  I hear there’s an app that’s a lot more flexible around media types, but I wasn’t dropping any coin on apps with Android on the horizon.

Final Thoughts: This thing is a STEAL at $99.99.  If you see one, buy it.  The original price tag was not realistic, not with the current polish of this device.  The most I would have paid if I was in the market for another tablet and it wasn’t fire-sale’d is probably about $250.  That’ll change if cyanogen is successful with their Android port.  It easily adds another $50 to $100 to what I’d pay, and I’ve got my fingers crossed I’m reviewing this same tablet again in a month or two with Android on it, much more favorably.

HP TouchPad – ORDER FAIL, FAIL, FAIL, FAIL

So I ended up ordering . . I believe 8 total of the HP TouchPads from:

Barnes & Noble
CDW
Insight

*ALL* my orders ended up cancelled.  This is a bit surprising since my first order with Insight was placed within 1 minute of the price decrease.  I think they must have sold out BEFORE they decreased the price.  My guess is that all of the above retailers don’t deplete stock until a human verifies/releases each order, OR the system automatically POSTS the credit card transaction.  Given the ridiculous amount of transactions these companies were doing during the rush, what usually occurs automagically was probably stopped by safety checks on the number of transactions, or raw amt. of revenue etc.  Once humans are involved in moving things forward, minutes and seconds very easily turn into hours and days.

It looks like the best bet for getting one of these at this point is probably through HP Directly.  They currently show OUT OF STOCK, but based on their tweets and sign-up page, it seems they do expect to get more in.

So, do you trust their notify page?  Well, I honestly do believe when they get stock, and verify orders are able to be completed, they’ll notify everyone.  That said, you can’t just immediately send emails to hundreds of thousands of people, and even if you could, greylisting and other limiters can often prevent you from receiving the email for a while.

By the time you get your notification, stock may again be depleted, for good.

What I’ve done is put together a very simple shell script that checks HP’s site for changes, and notifies me via email.  The email address I’m using is a “pushed” Exchange email, so I get notified immediately.

I’m pasting the script below, but please understand I do so with ZERO warranty, etc.   I don’t claim to be an expert in bash or scripting, and I’m sure there’s a better way to accomplish the same task.  Feel free to share in the comments if you’ve got a better way, but for me, this script DOES WORK, so I’m happy with it :)

To use this, you will need a Linux box with a bash shell, curl, bc, and the ability to send outgoing messages with sendmail locally.  If you can’t send outgoing email, the script will still alert you via the terminal that something has changed.

Here it is:

#!/bin/bash

#The URL to check for change
URL_TO_CHECK=”http://www.shopping.hp.com/webapp/shopping/can.do?landing=rts_tablet&category=rts_tablet&catLevel=1&storeName=storefronts”

#Number of seconds to wait between checks
FREQUENCY=”20″

#The phrase to look for on the page
PHRASE=”outofstock”

#The number of times the phrase occurs on the page with no change
OCCURENCES=”4″

#The subject to use for the alert email
ALERT_SUBJECT=”HP TABLET PORTAL CHANGED STATUS”

#The email address to send alerts to
ALERT_ADDRESS=”youremail@yourdomain.com”

# DO NOT EDIT BELOW THIS POINT
stop=no
iteration=1

while [ $stop = no ]

do

status=$(curl -s $URL_TO_CHECK | grep “$PHRASE” | wc -l)

if [ $status = $OCCURENCES ]
then
echo Iteration $iteration: NO CHANGE
sleep $FREQUENCY
else
echo “POSSIBLE CHANGE DETECTED, RE-CHECKING IN 30 SECONDS”
sleep 30
status_verify=$(curl -s $URL_TO_CHECK | grep “$PHRASE” | wc -l)
echo $status_verify

if [ $status_verify = $OCCURENCES ]
then
echo “FALSE ALARM, RESUMING NORMAL CHECKS”
else

echo CHANGED STATUS!!!!!!!!!!!!!!!!!!!!!!!!!!!!!!!!!!!!!!!!!!!!!
echo “Subject: $ALERT_SUBJECT
$URL_TO_CHECK” | sendmail $ALERT_ADDRESS
sleep 5

echo CHANGED STATUS!!!!!!!!!!!!!!!!!!!!!!!!!!!!!!!!!!!!!!!!!!!!!
echo “Subject: $ALERT_SUBJECT
$URL_TO_CHECK” | sendmail $ALERT_ADDRESS
sleep 5

echo CHANGED STATUS!!!!!!!!!!!!!!!!!!!!!!!!!!!!!!!!!!!!!!!!!!!!!
echo “Subject: $ALERT_SUBJECT
$URL_TO_CHECK” | sendmail $ALERT_ADDRESS
stop=yes
fi
fi
iteration=$(echo $iteration + 1 | bc)
done

The script goes to this URL:

http://www.shopping.hp.com/webapp/shopping/can.do?landing=rts_tablet&category=rts_tablet&catLevel=1&storeName=storefronts

and looks for the gif image names for those “Out of stock” buttons

They occur (4) times in the page, and it expects to see them (4) times.  If that number changes, it re-checks in 30 seconds, and if it’s still something other than (4), the alert sequence begins.  You can easily change the variables at the top to check other phrases at other URL’s, and make sure you replace the “youremail@yourdomain.com” with YOUR email address.

Happy shopping!