 I’ve gotten bitten by the 3D printer bug recently, and picked up an Anet A8 around Christmas.
It’s your typical corner-cutting Chinese kit printer, but it’s one of the nicer ones as far as features and electronics components. Unfortunately, like many cheap 3D printers, the wire and electronics for delivering power to the bed and hot end is inadequate. Let’s take a step back for a moment, and understand the basic electronics.
The key components are the power supply, the steppers, the LCD, control board, heated bed, and hot end. Most of these use very little power. Even the steppers all working at once use less than a few amps. The bed and hot end though are power hungry. I found the bed on my Anet A8 draws ~11 amps, and the hot end ~3 amps (@12v) . This a lot of current to push through the otherwise low power mainboard, especially for the bed. This will ultimately lead to failure, and you’ll be hunting for a whole new mainboard, or worse, putting out a fire.
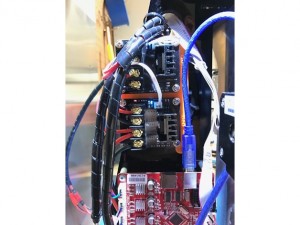
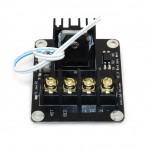
The solution: get that high current off the mainboard! Adding larger and separate mosfets to handle power deliver to the bed and nozzle takes all that strain off the mainboard, and will extend it’s life dramatically (and reduce the chance of overheating which could lead to fire). You could probably get away with just adding a mosfet for the bed, but I would suggest adding one for the hot end too. You’re re-wiring anyway, and they’re cheap, so may as well get as much current off the mainboard as possible. I used two of these mosfets.
The second problem is the wiring itself. The wire supplied in most kits suffers two key problems:
1) It’s bare copper, which over time loosens under the screw terminals, leading to resistance, which in turns causes the terminal to overheat and burn.
2) It’s often undersized (I’ve seen kits with 18ga wire that’s carrying close to 20 amps).
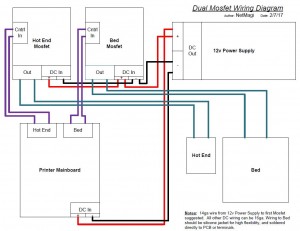
The wiring is an easy fix. When adding the mosfets (wiring diagram further down), use 14ga wire for the run to the bed mosfet, and a minimum of 16ga for all other DC power runs. Here is the link to the good silicone 16ga wire I used, and here is the link to the good 14ga wire. MAKE SURE YOU TIN ALL THE ENDS, OR USE QUALITY CRIMPED ENDS. I’m personally a fan of tinning all the ends. I’ve never had an issue with a properly tinned wire under a screw terminal. Come back and snug up the screws in a few days of use. They will stay tight, have VERY low resistance, and the solder ensures an even connection across all the wire strands. If you don’t have a good soldering iron, this is a good time to get one. I use the Hakko FX888D, and it’s exceptional. You’ll never buy another iron. If the Hakko is out of your price range, this one would be my choice for a basic iron.
Here’s the wiring diagram that brings it all together (click to view larger):
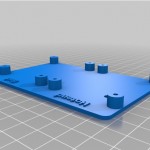
If you happen to also have Anet A8, I designed a mount to hold both of these mosfets, just above your mainboard:
Thanks for reading!

